Oct 31, 2009
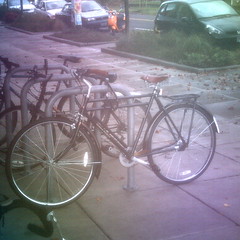
A Flying Pigeon stands at the Seven Corners New Seasons.
—orc Sat Oct 31 15:18:50 2009
Oct 30, 2009

Still life with Dust Mite and stripy socks.
—orc Fri Oct 30 22:00:12 2009
Tri-Met is buying a couple of RDCs to run on the westside commuter line. Officially they’re spares, but the lovely Colorado Railcar behemoths are apparently breaking down quite a lot, so the US$75,000/car cost of the (older than me) RDCs will be made up pretty quickly.
It’s a bonus that the RDCs look better than the Colorado monsters do.
—orc Fri Oct 30 16:43:15 2009
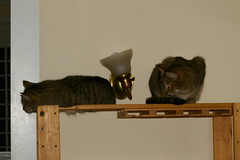
Leo & Mavis watch, with great interest, the proceedings around the front door this morning.
—orc Fri Oct 30 10:02:48 2009
Oct 28, 2009

A newly repainted caboose sits in the EPT yard last Saturday, after the sky cleared up when I was on the way home from the Mill End Store (from picking up some more-waterproof fabric for the next prototype in the handlebar bag project I’m working on.)
—orc Wed Oct 28 18:31:54 2009
Oct 23, 2009

Leo & Dust Mite have a serious discussion.
—orc Fri Oct 23 22:12:25 2009
I’ve been using the Apple iPhoto program to tweak photos before publishing them, and it’s more or less been okay to use (despite keeping copies of all of my photos on the Mac,) but, in the grand tradition of software everywhere, the programmers at Apple can’t keep their #@$#@%$@# fingers off the code. And they keep adding “features.”
Like the one they added sometime in the last few days (or whenever they put the stupid thing in; software update put the horrid thing on my notebook only a day or so ago) which is that g-dd-mn iPhoto goes into a shrieking fit if I have the nerve to pop a window up over the oh-so-important import screen. Not that I can actually do anything while it’s importing, of course, but it’s obviously really important to the programmers at Apple that I watch the stupid progress bar creep slowly across the bottom of the iPhoto window.
And then to add insult to injury iPhoto dumped core as soon as it finished importing the photos.
I wonder if I should just delete iPhoto and use Preview as my image editor?
—orc Fri Oct 23 22:05:22 2009

When I was going out to test the handlebar bag, I reached Gateway Transit Center just as a train came up from the airport and climbed up into the loop bridge. Now, if my camera was in the xtracycle panniers, I would have still been in the throes of getting it out of the pannier when the trolley looped on around, but today I just flipped open the handlebar bag, pulled out the camera, and took this picture before you could say “Jack Robinson.”
Yes, it’s not the greatest picture in the world, but it’s a fast picture that shows the advantage of having the camera right at hand instead of squirreled away at the far end of the bicycle.
—orc Fri Oct 23 18:45:42 2009
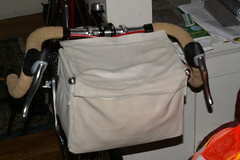
Damp, a little bit wilty, but it survived the first ride in the rain.
Last year, around the time I extracycled my Trek, I purchased a Nitto F15 handlebar bag holder. I fussed around with it for a while, but eventually decided not to put it onto the Trek because that made it look a little bit too ridiculous for my tastes. So it’s been sitting unused for the past year, until I started slowly gathering parts for the midlifecrisismobile. Now, the midlifecrisismobile is going to have a porteur rack on it, and the grand plan is that I’m just going to plunk down a bag on that rack (and carry a couple of straps so I can wedge boxes of donuts under the bag when I go out shopping) but the grand plan requires that I (a) build a rack and (b) build a bag.
I can’t do anything about the rack until I get a brazing torch, flux, and brass rods to melt all over the rack. But I can do something about the bag; my previous attempts at making a bag were somewhat less than completely successful, so I thought that if I first drew up plans and then built a prototype bag or two I’d be able to make a respectable looking bag when I finally glued the rack together and bolted it to the midlifecrisismobile.
And if I built a prototype rack, I would need to test it in real life, because I’d hate to make a pretty cloth box that messily disintegrated as soon as I went out on the line. And to do that, I would need to use some other method to attach the rack to the bicycle…
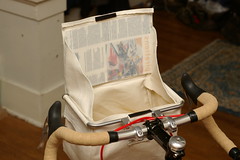
Oh, happy coincidence!
So on Tuesday I sat down and drew up a some drawings, wrote down some dimensions, and made sure I had enough parts to assemble a box. And on Thursday, I spent the bulk of the day cutting out canvas panels and sewing them together. And this morning I sewed/goo'ed on some velcro pads (a final bag will use snaps or buckles as closures, but I had some scrappy velcro lying around that I could use for free), spent about 45 minutes waxing the canvas, then loaded up the bag (raincoat, longsleeve woolen shirt, first aid kit, emergency blanket, gloves, 5 cookie bars, and my Pentax) and went for a ride, in the rain, down to the Columbia River (via the Springwater Trail and the Woody Guthrie Trail) and back to verify that the thing actually worked.
And it did. It rained hard enough so that my upper half got pretty much wet through, but the contents of the waxed bag stayed dry. Nothing fell out, even after a couple of pretty substantial jounces over cracks and tree roots in the path, and the little velcro patches on the thing remained stuck to each other without fuss or muss.
The gory details of this bag are possibly a bit too gory for anyone to duplicate, because I used a scrap of canvas that I got at the Mill End store on spec, but if you want to try and duplicate what you see here you need (all dimensions in mm & all canvas pieces need 5-10mm margin for hemming; if I say “140x90”, you need to cut 150x100 to 160x110):
- (1) 250x520 canvas (front/bottom/back)
- (2) 150x185 canvas (sides)
- (1) 250x200 canvas (lid)
- (2)140x90 canvas (carrier loops)
- (1) 60x150 canvas (back loop)
- (2) 150x170 TRIANGULAR canvas (lid flaps)
- (1) 250x150 COROPLAST, corrugations running across the long side of the panel (bottom stiffener)
- (1) 60x45 velcro patch
- (1) 60x15 velcro patch
- 1 piece of paraffin wax
To assemble,
- Hem the carrier loops, then sew the end over in a ¼" tube (just a little larger diameter than the Nitto tubing.)
- Sew the carrier loops to the side panels with the loops being 170mm above the bottom of the side panel centered.
- mark the 520x250 piece for the front/bottom/back; the back is 180mm deep, the bottom is 150mm across, and the front is 190mm.
- Pin the side pieces to the front/bottom/back inside out (so the seams are facing out)
- Sew the side pieces to the front/bottom/back. You now have a box that can be fastened to the Nitto handlebar bag holder.
- Hem the lid.
- Hem the back and sides of the box. I changed from my plans here and hemmed the top down to 175mm (just above the carrier loops) but if you want a little extra room don’t do this.
- Mark 30mm from the front of the lid (this will be where it fastens to the front edge of the box) and crease there. The lid now looks like an elongated L – the lid part is 170mm, and there’s a 30mm ledge hanging down.
- Sew the lid ledge to the box.
- Hem the triangular pieces.
- Sew the 150mm sides of the triangular pieces to the inside top edge of the box sides.
- Sew the 170mm sides of the triangular pieces to the sides of the lid (I didn’t do this correctly, and ended up with littler triangles; the plan is to have the triangular pieces longer than the box so they will shed water to the outside and not into the box. This may not matter, but if you’re doing it right it won’t be an unhappy surprise later.)
- Hem the back loop.
- Fold the back loop over 60mm from the top. Sew the bottom part of the back loop to the top center of the back of the box.
- Sew the fuzzy part of the 60x45 velcro patch to the top part of the loop, and the hooky part to the bottom part. There should be 30mm between the two pieces, centered on the fold mentioned in part 14.
- Reinforce all corners by hand-sewing
- Wax the outer surfaces of the bag.
- Stuff the 150x250 piece of coroplast into the bottom.
- Sew the fuzzy part of the 60x15 velcro patch to the outside of the back loop (the 60x45 pieces are on the inside, and when the loop is folded over the back on the Nitto F15 the little velcro patch should be facing upwards.
- Sew the hooky part of the 60x15 velcro patch to the center back edge of the lid, so that when you close the lid it sticks to the other 60x15 part.
- Install the bag onto the Nitto F15 (which is already on the bicycle?) by putting the two horns through the carrier loops on the side of the bag, then wrapping the back loop around the central part of the back tube (over the Nitto F15 label.) The bolts and washers can be replaced on the end of the tubes now for paranoia’s sake.
- Put stuff into the handlebar bag and go out for a ride.
Since this is a prototype, it’s missing a few features that you might want. I left the lining out so I could see if any water leaked through my homemade waterproofing, but it’s just a matter of a 660x250 + 2 180x150 liner pieces, sewn together, sewn to the lid and top of the box and tacked into the bottom corners. A map holder is needed, but that requires a trip to Mill End to get good clear plastic (or you can get a map case and tack that to the lid (I sewed a piece of clear plastic to the inside of the lid to stiffen it until I get a map holder installed) before I put it on, and I should really have an exterior pocket on the back for the first aid kit (If I’m hurt, I don’t want to have to dig through the whole handlebar bag to get out the medical supplies.) But it does have one big advantage even as it stands; I can put my camera in front of me and pull it out in one easy step when something interesting comes by.
—orc Fri Oct 23 18:18:00 2009
Oct 22, 2009
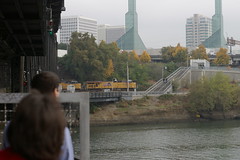
A pair of Yellow Menace engs pull a freight south along the east bank of the Willamette River (I was on the west side of the river at the time.)
—orc Thu Oct 22 20:21:29 2009
Oct 21, 2009
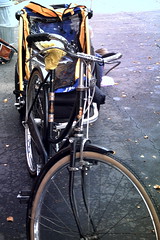
A Raleigh Tourist(?) sits in the Llewellyn schoolyard. There’s nothing special about it except that it has rod brakes instead of the normal Bowden cabled brakes that you find on about 98% of the (brake-equipped) bicycles in the United States.
The CBC says “Hi! Enjoy the exquisite image quality on this fine photograph!”
—orc Wed Oct 21 21:52:31 2009

I was running late this afternoon, so I didn’t have time to grab the Pentax and had to take the el-cheapo fixed-focus Vivitar CBC instead. So this picture of Silas showing two flowers at different stages of bloom is a little less than wonderful.
—orc Wed Oct 21 20:27:07 2009
Oct 20, 2009
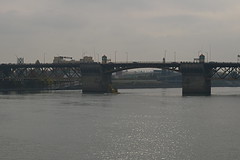
When I was out running around Portland today, I found myself reaching the Steel Bridge just as the klaxons sounded, the barriers went down, and the lower span was lifted out of the way. I looked around to see why, and it took me a minute or two to realize that, yes, the bridge was being raised because the second-smallest tugboat in Portland was pushing an equally diminutive barge down the river.

—orc Tue Oct 20 22:46:56 2009
Oct 17, 2009

Silas has been spending the last few afternoons after school lets out engaged in a project of picking holly berries and then carefully sticking them onto the thorns of the Himalayan Blackberry bushes that line the back hedgerow of the schoolyard. A large chunk of the blackberry bushes have been thus modified.
No, I’m not sure why he’s doing it. He’s an artist, and his muse isn’t saying a word.
—orc Sat Oct 17 23:53:22 2009
My trek has been extensively modified, but the one thing that hasn’t been changed is the gear arrangement. Sure, I ripped out the old 52/42 rings and replaced them with a pair of 52/40 Biopace chainwheels, but I left the bicycle with 7 gears in back, 2 in front.
I don’t use a lot of these gears, except by default. I normally ride in the 52 tooth chainwheel (and then I use 5 of the gears on the rear cassette, because by the time I drop down to the 32 tooth cog I’m already in irons and need to switch the front out too) and only swap to the 40 tooth chainwheel when I hit a long or steep grade (and then I’ll use 5 of the slowest gears there.)
A lot of these gears duplicate, and are only used because I don’t like to take my left hand off the handlebars to (carefully) shift from alpine to flat and visa-versa. And because my Trek has been xtracycled, I neeeeeed that 40×32 low gear so I can creep up the side of long and steep mountains very very slowly.
But the hypothetical midlifecrisismobile isn’t going to be xtracycled – I’m going to have a handlebar/front rack bag and I’ll use that to carry all the stuff I drag along on my longer loops. So it’s going to be a whole bunch lighter. Light enough so I can (hopefully) not have to worry about having a 33" gear for pushing the mighty flamingo up those steep hills.
So, instead of having a 7×2 transmission on 700c×28 tires and the following gear inches
|
52 |
40 |
| 12 |
116.0 |
89.2 |
| 14 |
99.4 |
76.5 |
| 16 |
87.0 |
66.9 |
| 18 |
77.3 |
59.5 |
| 21 |
66.3 |
51.0 |
| 26 |
53.5 |
41.2 |
| 32 |
43.5 |
33.5 |
I could take advantage of the slightly smaller 650b×38(or 33) on the midlifecrisismobile and go to a 1×8 gearset, for there are a whole bunch
of interesting gear ratios I can get.
|
48 |
46 |
44 |
42 |
40 |
38 |
| 11 |
113.5 |
108.7 |
104.0 |
99.3 |
94.5 |
89.8 |
| 12 |
104.0 |
99.7 |
95.3 |
91.0 |
86.7 |
82.3 |
| 14 |
89.1 |
85.4 |
81.7 |
78.0 |
74.3 |
70.6 |
| 16 |
78.0 |
74.8 |
71.5 |
68.3 |
65.0 |
61.8 |
| 18 |
69.3 |
66.4 |
63.6 |
60.7 |
57.8 |
54.9 |
| 21 |
59.4 |
57.0 |
54.5 |
52.0 |
49.5 |
47.0 |
| 26 |
48.0 |
46.0 |
44.0 |
42.0 |
40.0 |
38.0 |
| 32 |
39.0 |
37.4 |
35.8 |
34.1 |
32.5 |
30.9 |
Nothing matches exactly, of course, and I do either give up range at the top, the bottom, or both, but it looks like a 48 or 46 toothed chainwheel would give me more or less the range I’ve got with my current 7×2 setup. I’d lose some hypothetical top speed, but if I’ve got a bicycle that’s 25 pounds lighter, I should be able to gain some of that speed back by not having to drop into irons to get up those hills, and if I can do that there’s a fighting chance I can actually run a longer brevet and claw out enough time to park myself and sleep for ~8 hours in the middle of it (right now the mighty xtracycle takes about 11 hours to run a flattish 200k. That’s 7.5 hours in a 600k, which is not enough for a good night’s sleep in the middle) which, if past performance is any indication, is an important part of keeping me coherent, civil, and not ill.
And I’d not have to shift the front derailer while I was doing this, though I guess I’d have to do something about the protruding shifter mount on the downtube.
—orc Sat Oct 17 01:40:58 2009
Oct 16, 2009

It’s been One Of Those Weeks; the week after everyone else in the house recovered from the flu, I started slowly sliding down the steep slope to being sick. Dust Mite is attempting to hasten my recovery by supplying various types of dangerous drugs.
—orc Fri Oct 16 23:56:54 2009
Oct 14, 2009
UNITED STATES POSTAL INSPECTION SERVICE,
PO BOX 555, NEW YORK NY 10116-0555
EMAIL: sm.11@sify.com
This is to notify you that we have intercepted your parcel from Europe that DHL
COURIER SERVICE is making the delivery and we have stopped the delivery process
for some security reasons stated below:
Our scanning system has detected that your parcel contains a confirmable ATM
CARD to the tune of 1,500,000.00 USD.
Such ATM CARD coming from Europe must be verify by the POSTAL INSPECTION SERVICE which we have directed our inspection team to proceed with the verification
to ascertain the authenticity of the ATM CARD and now after all the verification on the Parcel/ATM CARD, having contacted the issuing institution who made it known to our office that the ATM CARD is a Genuine one and Not ILLEGALLY ACQUIRED. We have also forwarded the Serial Number of the ATM CARD to the United States,
Treasury Department and they confirmed that the CARD is Authentic and ready to
be cashed at any ATM MACHINES.
Also for the Delivery of the Parcel to continue, you are in obligation to obtain
, a Duly Sworn Affidavit from Spanish High Court which will back up the Origin of Fund. This is in line with the Anti-Terrorist Campaign which the USA Government has embarked on recently to protect our Territory from future attacks. You should therefore contact the sender of the ATM CARD or the DHL Courier Agent in Spain to get the Sworn Affidavit for you while we wait to receive from you the Affidavit File Number to enable us to forward your ATM CARD to your address. Below is his contact information. Note that the cost of the Affidavit is 89 dollars and
do not hesitate to remit the amount to him with your full name and valid contact phone number again.
Name: Raymond Carter
Email: raymondcarter2@sify.com
Tel: +34 672861779 +34 672861779
We shall then forward the ATM CARD to you and you will be sure of a genuine ATM
CARD that is coming to you. We are doing this for your interest considering the
rate which fraudulent and stolen checks/ATM CARD are been sent to our innocent
citizen that most times put them in problem. Always send your correspondence to
our secure email: sm.11@sify.com
Once again send your correspondence to our secured mail just to let us know what
is going on.
your urgent action on this notice will be appreciated
Mr Simon Muller
Chief Postal Inspector
And wouldn’t it be a shame if the spammer addresses here ended up on one of those “30 million double-verified!!!” spam address databases that get shilled around the net about 300 times a second? It seems like a cruel thing to do after they went to all the trouble to compose this torrent of barely literate nonsense, but one must keep the spammer ecosystems healthy.
—orc Wed Oct 14 19:14:18 2009
Oct 12, 2009
Oct 10, 2009

I was planning on riding the Mount Hood 217k this month, but it was nixed by the combination of snow in the passes (not a very serious problem, because the roads were plowed and most of the snow
melted by this weekend) and ODOT going into a highway construction frenzy on i84 through the gorge (BIG problem, particularly the chirpy “16 foot width” and “single lane” comments about the part of i84 that bicycles have to use to get from Troutdale to Hood River. Snow is one thing, but being splatted by 75mph semi-trucks is another.) So, instead of just doing nothing, I looked back at the UGB 200k which was slightly marred by it dumping down rain for the first half of the loop last time. The long-range weather forecast had been saying “sunny” for this weekend, so that would give me a chance to actually see the scenery on the first half of the loop instead of peering through fogged and rained-on glasses.
So I asked to ride it, was given the ok, and headed out this morning.
The executive summary is that the climb up to the top of the Boring lava lobe from Fischer’s Mill to Highland Road is extraordinarily pretty, starting with farms (and the teeny village of Fischer’s Mill), then winding up through beef cattle and horse farms into timberland which is punctuated by a collection of summer cottages and country houses ranging from honest homes to the sort of ridiculous temples to excess that blight the suburban landscape. And there were no flats, no humanitarian emergencies, and even with a nasty ENE wind that managed to be a headwind for 70% of the loop I still got back around to the start in 11h10 minutes (plus another 3 minutes sitting in line waiting for the people at Burger King to explain the difference between “value” (==small) and “small” (==large) to another bemused customer.
When I loaded up to go this morning, I brought along two spare sweaters (I call them jerseys, but they don’t have those back pockets so they don’t count) & a spare baselayer, because the last thing I wanted to do was to freeze my butt off like I did on the last few miles of the Barlow 300 a couple of weeks ago. And it was good that I did, because I overcompensated for the morning cold and ended up having to strip off and replace /all/ of my shirt layers on Highland Road because by the time I’d clawed my way up there they were soaked all the way through.
The xtracycle still slowed me down on uphills, but it didn’t slow me down as much as the headwind did. After crawling up to Highland Road and then screaming down the other side of the Boring Lava, I managed to make it into the Canby control with 67 minutes on the clock. “Great!”, said I, “I might be able to roll the rest of the way around the loop in 10 hours!” And despite being worn down quite a bit from fighting headwinds all the way from Sellwood to Boring, I made good enough time into Newberg so I thought that I might be able to do that, until I rolled out of town and back into the headwind, which slowed my forward progress to a creeping stagger (I was actually more than 2 hours up when I hit Newberg, so I stopped in a park, called home, and ate lunch. I never made up that 20 minutes :-() and made the rest of the loop up to the Rock Creek Tavern a grimmer (but still very scenic!) scrabble for extra minutes (I consider it a triumph that I didn’t manage to lose time at any of the controls; the worst I did was only gaining a minute between Rock Creek and downtown, and that included several stops for clothing changes, one stop to put the chain back on the front crankgear [after one of my “shift into my go-nowhere” shifts] and the time waiting in line at Burger King.)
And I really wanted to get home before nightfall, so the option of just slowing down didn’t even enter my mind. I think that this 200k loop ended up being harder than the Barlow 300k (modulo the DNF) because when I’m climbing a mountain I can see the road going up, but all I can see of a nasty headwind is the level road before me. (And I did get home before nightfall; I rolled in the door at about 18:30, and it didn’t get pitch black until about 19:00.)
No pictures, sorry; I didn’t bring the el-cheapo pocket camera (no batteries for it!) and I didn’t want to do the whole “stop, unpack the pentax, then take a picture” routine when I was moving (and I forgot to take a picture when I was stopped in Newberg.) It’s another point in favor of the midlifecrisismobile (which, when built, will require another loop of the UGB 200k so I can see if it’s any faster than Pete the xtracycle.)
—orc Sat Oct 10 21:41:49 2009
Oct 09, 2009

“My family tradition is every friday my dad takes a giant fake dust mite and takes a picture of it somewhere in the house. After he takes the picture he posts it on his weblog. I have no idea why he does this. He has been doing this for as long as I can remember. My b[r]other originally owned the dust mite then he gave it to my dad. That is my family’s tradition.”

Tradition!
—orc Fri Oct 9 22:33:44 2009
Oct 08, 2009
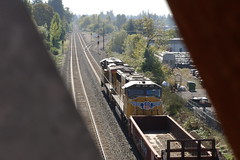
A pair of Yellow Menace Eng!s pull a rail+ballast trains south (and through a red signal!) under the Springwater Trail bridge over the SPYellow Menace mainline at around 12:20 today. I’d stopped because I was hoping that a northbound Amtrak train would show up, but that hope was quashed when the MOW train started rolling south past the futile red signal light.
—orc Thu Oct 8 21:15:10 2009
Oct 06, 2009

When I was going on a short loop this morning (I didn’t start until quite late, and I had to go by the LBS to get one my my taillights replaced after it just stopped working when I was 220km into the Barlow Trail 300k two weeks ago. Fortunately the LBS replaced the offending light without fuss, muss, or bother, so I’ve got my three-light taillight setup back now) I reached Gateway Transit Center just as a pair of SD70s climbed onto the bridge over i84/i205. The usual problem with the xtracycle still holds, but I did manage to get the camera out and taking pictures before the offending train was too close to properly photograph with my 55mm super-tak lens.
—orc Tue Oct 6 17:07:05 2009
Oct 03, 2009

When I was coming back from Kobos this afternoon, I saw this excursion train parked on the Portland Traction mainline opposite Oaks Park. I was accelerating for the ramp up to Spokane street, but that took a backseat to the far more important job of stopping and getting a picture of the Eng! and its associated train.
From the looks of things, it was being used as a birthday train (there were a bunch of adults setting up a table with goodies and balloons on the ex-Simpson caboose/coach) and, I suspect, was waiting for the birthday mob to pour out from Oaks Park for a ride up and down the river.
—orc Sat Oct 3 23:26:55 2009
Oct 02, 2009

So it’s too late in the season to ride over the Cascades, then turn around and ride back over them again before sunset? There might be enough time to at least make it around Mount Hood before this part of the planet inconveniently rotates away from the nearest star.
So there is the teeny problem of the 4600 foot climb up over Bennett Pass, but that’s simply a matter of sitting on the bicycle and grinding on uphill for 40 or so miles out of Hood River (and none of that at a grade much worse than 4%, which is better than certain other brevets I can think of) and then stopping, putting on many layers of windproof clothing and screaming down the mountain to Sandy, Orient, and 282nd into Gresham.
Shoot, The sun probably might not even go down until I reached Orient. Or home, if I could sell enough junk on eBay to pay for the remaining parts of the hypothetical midlife crisis mobile and ride that instead of the 50 pound luxury yacht I’m currently using for everything.
All I’d have to worry about would be the possibility of snow on the ground. And finding other crazy people who’d want to do it with me.
—orc Fri Oct 2 22:12:13 2009

Dust Mite and Mavis doze on the sofa.
—orc Fri Oct 2 21:46:27 2009
—30—


