Feb 28, 2013
When I bought that torch a couple of weeks ago, it came with a small (but heavy) pile of tools & jigs, including a seat tube reamer. I didn’t know if the reamer would be good for anything, but I tucked it away in the basement.
Today, the freebie GT Talera arrived and I mocked it up. The one thing I couldn’t properly mock up was the seatpost, because the GT Talera uses a 26.8mm post instead of the 27.2mm post that everybody else uses. So I mocked it up with the heavy steel seatpost that it came with, but wasn’t happy at the thought that I might have to buy another seat post.
But, as I tidied up the basement after building the mockup, my eyes fell upon the box that the reamer came in. Oh ho! There’s nothing stopping me from putting a 27.2mm seatpost in except for spending several hours reaming out the existing seatpost and removing ~.15mm from the stout walls of the seat post.
It’s hard work (I don’t have a good handle, so I’ve clamped a Vice-Grip to the handle. It doesn’t have as much leverage as a proper handle) but I’ve already made a first pass (bringing the ID up to ~27mm) down to the minimum insertion point. I’ll run the reamer down about 3 inches further than that, then back it out, expand the cutters to 27.2, and run it down again, at which point I’ll be able to pull one of my spare seatposts out of my bike mess and use it.
And, aside from it not costing me anything, it’s a good way to get a feel for part of the framebuilding process :-)
—orc Thu Feb 28 23:32:38 2013
I’m going to have to delay assembling the bike kit for a while, it appears, because I managed to score a free GT Talera frame set (and immediately discarded the fork, because it’s heavy and ugly) which I am going to try to build up from parts lying around the basement (plus a used fixed-fixed hub, if I can find one that uses 130mm spacing, because I want to try it out a fixed-gear bicycle.)
It started out as a 26" bike, but it has buckets of clearance for 650b (or even 700c, if I wanted to use disk brakes and have it be a 650b winter/700c summer bike) wheels, even if they’re fitted with Grand Bois Hetres. The axle to crown measurement on the fork is huge, to the point where I can put a 700c low-trail Electra Ticino fork onto it without messing up the geometry at all (right now it’s tipped forwards a little bit but that’s because I haven’t moved the bearing race over to the new fork and I’ve got a 700c wheel under the back just to keep it off the ground – when I get a 650b wheel in back and have reinstalled the headset it will level back out.)
I believe I’ve already got everything I need to build this into a bicycle sitting in the basement (except for a fixed-gear hub, but I might just lock a freehub and use that instead) so I’ll be able to get a nice low-trail porteur fixie for the cost of enough tubing to build a front rack :-)
—orc Thu Feb 28 21:43:51 2013
Feb 27, 2013
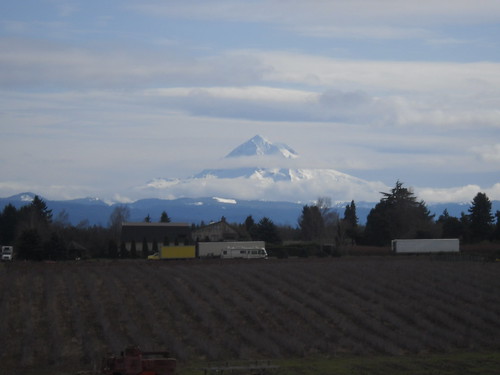
Mount Hood looms over suburban Boring.
—orc Wed Feb 27 16:54:31 2013
Feb 25, 2013
I looked around online to see if there were any greases/lubes that I could use to repack my skipping Angry Bee without going out and spending a lot of money for a teeny tube of Ringdrive lube, and a couple of places mentioned that Pedro’s Syn Lube would work. And, by happy coincidence, I had some of that lying around.
So I pulled the hub apart (after clamping an allen wrench in a vice, dropping the wheel onto it, then giving a mighty heave with the other allen wrench,) carefully lifted the ringdrive spline piece to one side, then poured in Syn Lube and put the whole thing back together.
I tried to make the thing not engage, with no success, but the big difference was that the previously muted cry of the angry bee had become much more enthusiastic. Good. This will give me some audible feedback to tell me the next time I have to pull the hub apart and relube the inner workings.
—orc Mon Feb 25 20:09:48 2013
Feb 24, 2013
Today I went out and rode One Big Hill again (with a bonus hour dropped in because I was going to set a secret control for three riders who started half an hour after I did – I guess I’m getting faster, because even my out of shape “oh lord these hills are hard” mode put me 30 minutes up on them by the time I was 36 miles out) and about the time my legs had had enough and started just not working on climbs (Like, um, Leland Road, which I did manage to big-ring up even though I felt like throwing up for about half the climb (I didn’t throw up, though)) the Angry Bee hub on the mlcm started to just not engage when I’d start pedaling after stopping or coasting for a while.
The Chris King website claims that this is a symptom of the lubrication getting low, so that’s a simple case of just getting a bit of Ringdrive lube, taking the freehub off the rest of the hub, and either applying new lube or cleaning the Angry Bee mechanism and repacking it with lube. And fortunately for me hub only lost engagement over about 30% of a pedal rotation, so I could back&forward pedal to engage it after it failed.
I can always drop a new rear wheel onto the bicycle while I’m rebuilding this hub, or I can use the project bike for the couple of days it will take to get some of that lube.
—orc Sun Feb 24 22:07:50 2013
Feb 23, 2013

One more porteur rack, but this is the last one I’ll build with the bernzomatic mini-torch.
—orc Sat Feb 23 22:26:46 2013
Feb 22, 2013
Feb 20, 2013
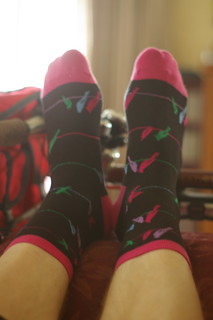
Fortunately my feet are just small enough so I can fit them into large womens socks, because otherwise I’d be stuck with the much more boring patterns that are available for mens clothing.
—orc Wed Feb 20 22:17:26 2013
Feb 19, 2013
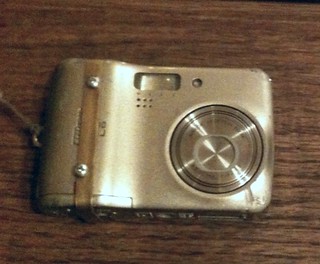
The battery bay door on my ancient creaky Nikon L6 throwaway camera failed and tends to pop open and render the camera unusable when I’m riding a brevet/populaire (where I’m not going to stop to futz with it because I’m still trying to get that sub-4 populaire/sub-8 200k/sub-12 300k.) It did it again today when I was riding down to Estacada, so I didn’t get a photo of Mount Hood wreathed in clouds as I transited Amisigger Road.
Well, there’s nothing wrong with the camera that bolting a L-shaped piece of brass bar won’t fix (I would have preferred to use stainless steel, but I had brass barstock in the basement so I used what was on hand.) I drilled a couple of holes in the camera, then bolted the bar on so it would clip the battery bay door closed. I don’t know how long this will work for, since I’ll need to unbolt the bar when I charge the batteries, but I guess I could always epoxy some nuts into the case if the boltholes strip out.
—orc Tue Feb 19 23:09:00 2013
Feb 18, 2013
I bought a used torch via craigslist, and when I went to pick it up I discovered that it wasn’t just the torch, but
- oxygen + gas bottles (partially filled)
- brass (bare + prefluxed)
- an adjustable reamer
- hacksaw blades
- a 3 foot section of 1" tubing
- a frame alignment jig/tool
- a fork brazing jig
This was about 120 pounds of stuff (the fork brazing jig is heavy – at least 60 pounds by itself, maybe more) but I managed to fit all of it onto the trek and bring it, slowly, home.
(and then when I got home I discovered that the tubing I’d ordered had arrived, so now I can braze up a couple more racks plus replace the horrible stays on my pink fenders with stiffer external stays made from 3/16th cromoly steel tubing, but that’s a different story for a later date.)
—orc Mon Feb 18 17:42:10 2013
Feb 15, 2013
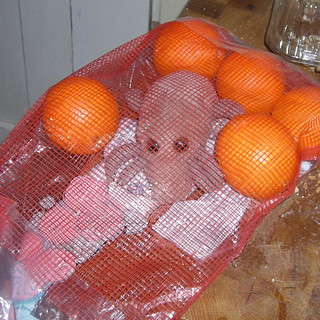
Absorbing vitamin C by osmosis
—orc Fri Feb 15 23:44:52 2013
Feb 14, 2013

Drill holes in a steel plate, use a hacksaw to cut out rectangular lozenges, braze into the ends of steel tubes, file to shape. Perfect!
—orc Thu Feb 14 18:36:34 2013
Feb 11, 2013
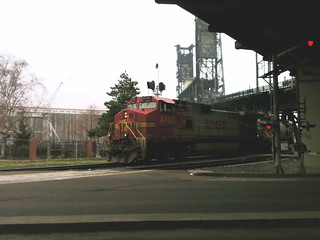
I’d just crossed the railroad tracks at the Steel Bridge and Naito Parkway when the crossing signals triggered, so I stopped along the road and took pictures as the train (a light engine move returning from Albina Yard) came across the bridge and road.
—orc Mon Feb 11 23:12:02 2013
Feb 09, 2013
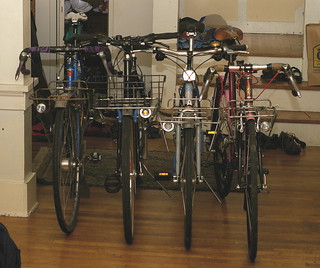
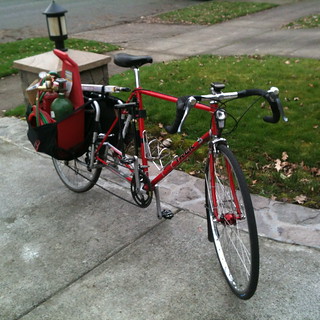
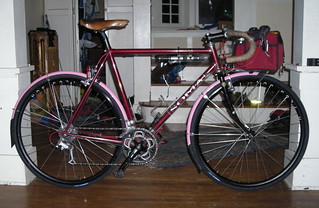
The project bike, Russell’s Kogswell P/R, the Murray Baja Experience, and the midlifecrisismobile pose with their porteur racks & lights. The mlcm’s rack is teetering on the edge of being too small to be called a porteur rack (it’s only 8" × 8") but I have stuffed a porteur bag onto it and taken it shopping, so I’m going to count it.
(I also notice that the seat is considerably lower than the seats on the project bike and the Murray Baja Experience!, so I’m going to have to shove it up a little bit more before my next populaire. Oh well, the poor midlifecrisismobile is in the throes of being experimented on these days, so it can’t be helped.)
—orc Sat Feb 9 15:13:50 2013
Feb 08, 2013
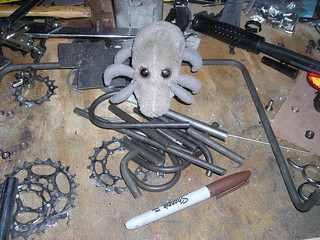
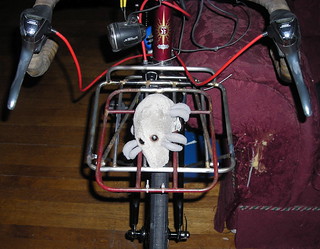
Dust Mite sits among the scraps of tubing that were left behind during my last rackbuilding expedition.
—orc Fri Feb 8 23:33:20 2013
Feb 07, 2013
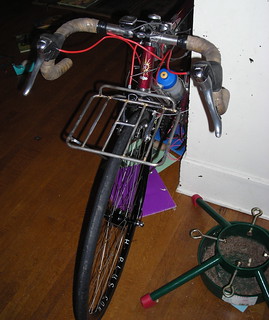
I still don’t know where to attach to the fork crown, but that doesn’t stop me from brazing on the main struts of the rack. And once the rack is in, why not test-fit a rando bag?
—orc Thu Feb 7 15:39:09 2013
Feb 06, 2013
The Murray Baja Experience is getting closer to being a completely functional bike. Today I put fenders on it – a pair of 45mm Velo Orange hammered aluminum fenders (which were originally on the midlifecrisismobile but didn’t fit under the stock Soma Speedster fork (the low-trail cyclocross fork and mini-V brake fix that wagon, of course, but fashions have changed since I took the fenders off)) – which I rerolled to 650b diameter for this bike. I could probably put Hetres onto the Baja and fit them under the fenders, but the Hutchinson Confrérie des 650 tires that are under it are smaller and give me more room between the fenders and the tires.
All that’s left to do are the rack (brazed up, but not mounted because I’m not sure about the mount points yet – I could braze a couple of rack mounts onto the fork, but that feels kind of like cheating) and the new wheelset + lights. And then the best will be able to use it to ride to and from school if she so desires :-)
—orc Wed Feb 6 21:06:09 2013
Feb 04, 2013
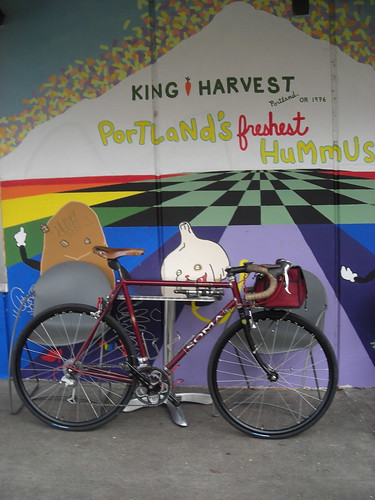
I got these pink Planet Bike Cascadia fenders for dirt cheap on ebay. Apparently nobody buys them. Lucky for me that they don’t, because they’re perfect for the midlifecrisismobile’s little-black-dress mode. Please ignore the fender line – this is a mockup since I’ve not yet brazed the fender mounts onto the front rack and punched a hole in the rear fender to attach it to the brake bridge (though I might just use a Sheldon Nut to attach the black plastic mounty clamp to the bridge) – because it’s going to be better before I take the mlcm out for brevets later this week.
—orc Mon Feb 4 20:39:50 2013
I like to think of myself as someone who isn’t pulled by the forces of fashion and who will just put things together that work despite how they might look together, but, alas, when I got the H+Son Archetype rims to replace the worn out Open Sports on the midlifecrisismobile they did bad things to my contempt for looks. First I had to discard my silver SON 28 for a black PV-8 so I could have all black hubs + rims (the SON 28 was not thrown out, though; it’s been set aside so I can lace it into a 650b wheel for the Murray Baja Experience!), then I had to replace the silver seatpost and stem with black ones, then finally I had to pull the silver fenders (which will be rolled to a smaller diameter and put onto the Shiromoto.) Alas, I don’t have any non-battered black fenders lying around, but I do have a pink set and I’ll probably put them onto the bicycle as a temporary stopgap (maybe painted red or black? Let’s see how ridiculous they look first!)
Note one of the side-effects of the low trail fork is that I can get away with putting my big rando bag further forward than I used to be able to put it. The new front rack has a usable 8"×8" platform (compared to the old rack which only had about 6"×6" usable) and until I braze up a new decaleur I’ve got the bag pushed forward so it can be strapped to the front of the rack as well as the sides. The older fork rode increasingly unhappily as I loaded things forward, but this fork doesn’t seem to care very much and I can actually ride the bicycle no-handed with the rando bag shoved way out in front. When my hands are off the handlebars the bicycle tends to wander a little bit, though, so I should try riding no-handed when I’ve got a load in the bag (I don’t use historical reenactment fabrics, so my bag only weighs about 14 oz, so it plus the rack is < 2 pounds, or basically nothing in the load department) to see (a) if I can do it and, of course, (b) if the wandering tendency subsides.
—orc Mon Feb 4 13:08:04 2013
Feb 03, 2013
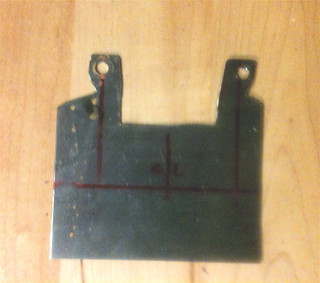
This is a jig that I used to set up the fork crown stays on the front rack for Russell’s Kogswell so I didn’t have to rely on a maze of clamps to hold things in place while brazing.
Now that Kogswell is dead and no new P/Rs will ever be appearing (yes, I know that Longleaf said they were going to do it, but they’ve fallen into the deep hole of 650b flakiness so I’m not going to hold my breath) it’s probably gone past its sell-by date already, but at least it gave me a good way to do this tricky bit of assembly for Russell’s P/R.
—orc Sun Feb 3 18:49:15 2013
Feb 02, 2013
I’d bought a used Nitto M-12 rack for cheap a few months ago as a form for building handlebar bags, but eventually thought it would be more useful if I could put it onto a bicycle and use it for test-riding finished bags. The problem was that the reason why it was cheap was because the fork crown bolt had snapped off leaving only the two canti post mounts to hold it on.
This is not a problem. It would be simple to cut the end of the remaining fork crown mount off and braze a metric bolt onto the stub instead of the no-doubt custom piece that Nitto used. So I clamped it in a vise and hacksawed the end off, onto to discover a cross-shaped recess in the middle of the section I cut off. It turns out, apparently, that Nitto made the same discovery I did (but probably 20 years, if not more, earlier) in that a regular old steel M6 bolt makes an ideal custom bolt piece.
And it was brazed, not welded, on.
So all I need to do is take a little bit of chrome off the stub, jig and flux it (as well as another bolt), then braze everything together to make a rando rack that’s virtually indistinguishable (except for the teeny detail that my brazing skills are, ahem, not quite as good as Nitto’s staff) from the original.
And then I’ll get it powder coated, eventually, when I powdercoat the rest of the collection of racks I’ve made up.
—orc Sat Feb 2 23:46:23 2013
I wanted to ride a 200 today, but, sadly, I came down with a cold this week and didn’t have the energy to do that. But what I did instead was to patch together the midlifecrisismobile to get it to the point where I could ride it again.
And then I took it out for a short 35 mile loop to see if anything would break and how it would feel compared to the project bike. The mlcm is pretty different from the project bike, and it was made more different by adding a low trail fork to the mix, so I can’t easily compare them, but I did notice that
- It’s a lot stiffer than the project bike. I suspect a large part of that is because the Archetypes are more rigid than the Open Sports that used to be on the wheels, but I don’t know.
- I can’t really detect any difference between the low-trail fork and the old high-trail fork except that I can actually ride the mlcm no-handed now.
- I need to raise the seat a little bit, push it back a little bit, and maybe get a longer 17° stem.
- The silver fenders have to go. It’s time for black polycarb all of the days and all of the nights.
- I need to braze canti posts on the seatstays and put a mini-V on the rear wheel.
The current mlcm build is
- Soma Speedster frame
- Soma cyclocross fork, reraked to ~70mm offset
- Chris King headset
- Swobo Novak stem (100mm, ±10°)
- Aerus AL seatpost (from the Shiromoto)
- Nitto B135 handlebars
- Berthoud saddle (no, I don’t know the name; it’s the 157mm wide one)
- UN26 bottom bracket
- FSA Vero crankset, with 50/34 rings
- Shimano Sora pusher and dangler, which have lasted three years and 20,000 miles.
- Shimano Tiagra 9-speed brifters
- some miscellaneous 11-28 cassette
- IQ Cyo headlight
- Spanninga Pixeo taillight (which appears to be failing now)
- Angry Bee+PV8 hubs laced to 32h H+Son Archetype rims, with Resist Nomad 28mm tires
- Tektro mini-V + travel agent on the front wheel, Tektro R530 rear
—orc Sat Feb 2 18:39:54 2013
Feb 01, 2013
Dust Mite does some QA on a couple of racks.
—orc Fri Feb 1 20:18:59 2013
I finally dragged the mlcm out to the garage this afternoon for a quick brazing session, and it came back with the new rack glued to the rack struts and fork crown support.
The midlifecrisismobile is back on line now, yay, and I can rotate the project bike into the back room for a while while I see how the new rack and low-trail fork work out in city riding and on brevets.
(There’s still a small punchlist to be done before it’s actually finished; I need to
- braze on a (left-side) light mount
- braze on two strut braces
- braze on a couple of standoffs to mount the front fender to
- re-true the rear wheel
- fish the lighting wires up the inside of the right fork blade
- fish the cycle computer wires up the inside of the left fork blade
- maybe braze in a couple of wire guides? I’ll have to think about that…
before I can take it out on anything longer than a fast populaire. But that’s a much smaller checklist than the one that also includes making a rack.)
—orc Fri Feb 1 18:06:11 2013
—30—